tkinter basics
tkinter is a graphical interface library for tk in Python. You can use it for graphical interface design and interactive programming. The advantage of tkinter is that it is quick to use and has a good combination with Python.
The Python version used in this page is version 3.x, if want to how to obtain the path in python 2.x using tkinter, please through apt-get to install. Note that tkinter may be used in different Python versions. We recommend that you use python3.
Related course: Python Desktop Apps with Tkinter
tkinter hello world
First-For a basic example of tkinter, create hello_tkinter.py in IDLE. The code is as follows:
import tkinter as tk

# Create a tkinter window and set the window title
top = tk.Tk()
top.title("Hello Test")

# Create tags in the window
labelHello = tk.Label(top, text = "Hello Tkinter! ")
labelHello.pack()

# Run and display the window
top.mainloop()
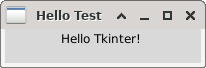
GUI window is created with Python. A label is shown in the code, with the text "Hello Tkinter!".
Table 1 Common parameters of Label components
| Parameter | Description |
|---|---|
| Height | The height of the component (number of rows) |
| width | The width of the piece (the number of characters occupied) |
| fg | font color |
| bg | background color |
| justify | The alignment of multiple lines of text. Optional parameters are: LEFT, CENTER, and RIGHT. |
| padx | The number of spaces on the left and right sides of the text (default is 1) |
| pady | The number of spaces on the upper and lower sides of the text (default is 1) |
Run the program under the Shell to show a simple window.
$python3 hello_tkinter.py
Related course: Python Desktop Apps with Tkinter
tkinter push-button
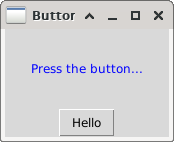
Button is one of the most commonly used graphical components of tkinter. It can easily interact with users through buttons. The following code implements the trigger. An example of a button event (pressing a button) to perform a specified operation (change the label content).
import tkinter as tk

def btnHelloClicked():
    labelHello.config(text = "Hello Tkinter!")

top = tk.Tk()
top.title("Button Test")

labelHello = tk.Label(top, text = "Press the button...", height = 5, width = 20, fg = "blue")
labelHello.pack()

btn = tk.Button(top, text = "Hello", command = btnHelloClicked)
btn.packAuthor (s):


top.mainloop()
The btnHelloClicked() function is defined in the code, and the function of executing the code in the btnHelloClicked() function is specified by assigning a value to the Button's command property. In this function, through labelHello.config() changes the text parameter of the label, that is, the text content of the label.
Table 2 Basic parameters of Button components
| Parameter | Description |
|---|---|
| Height | The height of the component (number of rows) |
| width | The width of the component.The number of) |
| fg | Prospects font color |
| BG | Background color |
| activebackground | The background color when the button is pressed |
| activeforeground | The foreground color when the button is pressed |
| Justify | The alignment of multiple lines of text. Optional.Number: LEFT, CENTER, RIGHT |
| padx | The number of spaces on the left and right sides of the text (default is 1) |
| pady | The number of spaces on the upper and lower sides of the text (default is 1) |
Entry widget
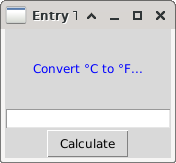
The Entry box is used to enter a single line of content, which can easily pass user parameters to the program. The use of this component is demonstrated here through a small program that converts Celsius and Fahrenheit.
import tkinter as tk

def btnHelloClicked():
    cd = float(entryCd.get())
    labelHello.config(text = "%.2f°C = %.2f°F" %(cd, cd*1.8+32))


top = tk.Tk()
top.title("Entry Test")

labelHello = tk.Label(top, text = "Convert °C to °F...", height = 5, width = 20, fg = "blue")
labelHello.pack()

entryCd = tk.Entry(top, text = "0")
entryCd.pack()

btnCal = tk.Button(top,text = "Calculate", command = btnHelloClicked)
btnCal.pack()

top.mainloop()
The code in this example is modified from ## 1.2.1, and an Entry component, entryCd, is created,The text parameter sets the default value of the input box to 0 ". When the button is pressed, pass entryCd.get() obtains the text content in the input box. The content is of a string type. You need to convert the float() function to a number, and then convert it and update the label display content.
Table 3 common parameters of Entry components
| Parameter | Description |
|---|---|
| Height | The height of the component (number of rows) |
| width | The width of the component (the number of characters) |
| fg | Prospects font color |
| BG | Background color |
| Show | Replace the text in the Entry box with the specified character for entering the password.Etc., such as setting show = "*" |
| state | Set the status of the component. The default value is normal. It can be set to: disable the component, readonly-read-only |
Fahrenheit Celsius temperature conversion procedure
Related course: Python Desktop Apps with Tkinter
tkinter check box
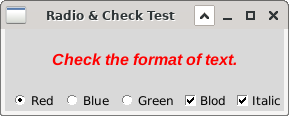
The radio box and Checkbutton are used to implement the radio and check functions of options respectively. The code in this example implements the setting of the radio box and the check box.
import tkinter as tk

def colorChecked():
   labelHello.config(fg = color.get())

def typeChecked():

   textType = typeBlod.get() + typeItalic.get()
   if textType == 1:
       labelHello.config(font = ("Arial", 12, "bold"))
   elif textType == 2:
       labelHello.config(font = ("Arial", 12, "italic"))
   elif textType == 3:
       labelHello.config(font = ("Arial", 12, "bold italic"))
   else :
       labelHello.config(font = ("Arial", 12))

top = tk.Tk()
top.title("Radio & Check Test")

labelHello = tk.Label(top, text = "Check the format of text.", height = 3, font=("Arial", 12))
labelHello.pack()

color = tk.StringVar()
tk.Radiobutton (top, text = "Red", variable = color, value = "red", command = colorChecked).pack(side = tk.LEFT)
tk.Radiobutton(top, text = "Blue", variable = color, value = "blue", command = colorChecked).pack(side = tk.LEFT)
tk.Radiobutton(top, text = "Green", variable = color, value = "green", command = colorChecked).pack(side = tk.LEFT)

typeBlod = tk.IntVar()
typeItalic = tk.IntVar()
tk.Checkbutton(top, text = "Bold", variable = typeBlod, onvalue = 1, offvalue = 0, command = typeChecked).pack(side = tk.LEFT)
tk.Checkbutton(top, text = "Italic", variable = typeItalic, onvalue = 2, offvalue = 0, command = typeChecked).pack(side = tk.LEFT)

top.mainloop()
In the code, the color of the text is selected through Radiobutton, only at the same time.Can choose a color. In the three Red, Blue, and Green radio boxes, the same variable parameter color is defined. Choosing different radio boxes will give different string values to the variable, the content is the corresponding color.
If any radio box is selected, the colorChecked() function will be triggered to change the label to the corresponding radio box.Color.
Table 4 common parameters of the Radiobutton component
| Parameter | Description |
|---|---|
| variable | The index variable of the radio box. The value of the variable is used to determine which radio box is selected. A group of radio boxes uses the same index variable. |
| Value | The value of the variable when the radio box is selected. |
| command | The command (function) that is executed when the radio box is selected. |
The bold and italic styles of text are implemented by check boxes, which define typeBold and typeItalic variables respectively to indicate whether the text is bold and italic.
The typeChecked() function is triggered when the state of a check box changes. This function determines which check boxes are selected and sets the font to the corresponding style.
Table 5 common parameters of Checkbutton components
| Parameter | Description |
|---|---|
| variable | Check box index variables that determine which check boxes are selected by the value of the variable. Each check box uses a different variable to make the complex.The marquee is independent of each other |
| onvalue | The value of the variable when the check box is selected (valid) |
| offvalue | The value of the variable when the check box is not selected (invalid) |
| Command | Command (function) executed when the check box is selected |
Canvas drawing component
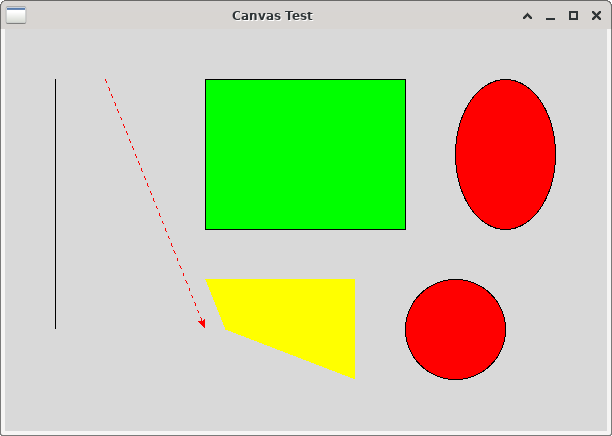
The drawing component (Canvas) can realize the drawing of 2D graphics in GUI, which is equivalent to a drawing board. The component has a variety of built-in drawing functions, which can be drawn straight through simple 2D coordinates.Line, rectangle, circle, Polygon, etc. This example shows the drawing function of the Canvas component. For more drawing functions, see the reference page of Canvas.
import tkinter as tk

def drawCircle(self, x, y, r, **kwargs):
   return self.create_oval(x-r, y-r, x+r, y+r, **kwargs)

top = tk.Tk()
top.title("Canvas Test")

cvs = tk.Canvas(top, width = 600, height = 400)
cvs.pack()

cvs.create_line(50, 50, 50, 300)
cvs.create_line(100, 50, 200, 300, fill = "red", dash = (4, 4), arrow = tk.LAST)

cvs.create_rectangle(200, 50, 400, 200, fill = "green")

cvs.create_oval(450, 50, 550, 200, fill = "red" )
drawCircle(cvs, 450, 300, 50, fill = "red")

cvs.create_polygon(200, 250, 350, 250, 350, 350, 220, 300, fill="yellow")

top.mainloop()
The parameters of the drawing function are better understood, including basic coordinates and color, line type and other additional parameters.
A line, that is, a line segment, passes through twoEndpoint definitions. The coordinate sequence is x1, y1, x2, and y2.
A rectangle is defined by two points on the diagonal.
It should be noted that there is no circle drawing function in Canvas. Here, the function drawing circle () is indirectly realized by drawing ellipses. The ellipse (oval) is the diagonal through the circumscribed rectangleLine two points to define (don't tell me you don't know what a circumscribed rectangle is...). As shown in the following figure:
messagebox
messagebox is used to pop up a prompt box to alert the user, or let the user choose how to proceed next. Message boxes include many types, such as info, warning, error, yeno, and okcancel. They contain different icons, buttons, and pop-up prompts.
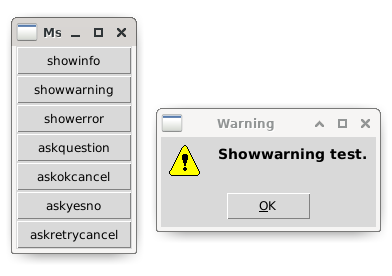
The following code demonstrates the running effect of each message box.
import tkinter as tk
from tkinter import messagebox as msgbox

def btn1_clicked():
    msgbox.showinfo("Info", "Showinfo test.")

def btn2_clicked():
    msgbox.showwarning("Warning", "Showwarning test.")

def btn3_clicked():
    msgbox.showerror("Error", "Showerror test.")

def btn4_clicked():
    msgbox.askquestion("Question", "Askquestion test.")

def btn5_clicked():
    msgbox.askokcancel("OkCancel", "Askokcancel test.")

def btn6_clicked():
    msgbox.askyesno("YesNo", "Askyesno test.")

def btn7_clicked():
    msgbox.askretrycancel("Retry", "Askretrycancel test.")

top = tk.Tk()
top.title("MsgBox Test")

btn1 = tk.Button(top, text = "showinfo", command = btn1_clicked)
btn1.pack(fill = tk.X)

btn2 = tk.Button(top, text = "showwarning", command = btn2_clicked)
btn2.pack(fill = tk.X)

btn3 = tk.Button(top, text = "showerror", command = btn3_clicked)
btn3.pack(fill = tk.X)

btn4 = tk.Button(top, text = "askquestion", command = btn4_clicked)
btn4.pack(fill = tk.X)

btn5 = tk.Button(top, text = "askokcancel", command = btn5_clicked)
btn5.pack(fill = tk.X)

btn6 = tk.Button(top, text = "askyesno", command = btn6_clicked)
btn6.pack(fill = tk.X)

btn7 = tk.Button(top, text = "askretrycancel", command = btn7_clicked)
btn7.pack(fill = tk.X)

top.mainloop()
Related course: Python Desktop Apps with Tkinter