Python tkinter components
In tkinter each component is a class, creating a component is actually instantiating the class. During the instantiation process, you can set some properties for the component through the constructor, and you must also give the component specifies a parent container, which means where the component is placed.
Finally, it is also necessary to set up a geometry manager (layout manager) for the components, which solves the problem of where to put it, and also needs to solve the problem of how to put it. The layout manager solves the problem of how to put it, that is, the placement of child components in the parent container.
Related course: Python Desktop Apps with Tkinter
Button
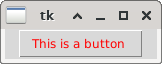
A simple button to respond to a user's click. Can be associated with a Python function, which is automatically called when the button is pressed.
B = Button ( master, option=value, ... )
For more information about these parameters:
- master: The parent container that carries the button.
- options: optional, that is, the settable properties of the button.
from tkinter import *

def onclick():
    print("onclick !!!")

root = Tk()# Instantiate window

# Create Button, use the command option to associate a function
Button = Button(root,text = 'This is a button ',fg = 'red',command = onclick)

# Set the pack layout method
Button.pack()

# show window
root.mainloop()
Button commonly used attributes:
- The text content of the text string button is active when the component is placed
- The attributes bg the background color of the button is active, fg foreground color
- bd border width of the button is pixels. The default value is the size of the border of 2 pixels. The default value is the size of the border bg(background) of the button.
- command the function associated with the button, when the button is clicked
Label
A label Assembly. Mainly used to realize the display function, can display text and pictures.
l = Label ( master, option=value ... )
Its instantiation method and pressThe buttons are the same. It can be said that the components are all instantiated in this way. *** The attribute of Label can directly refer to the button. In fact, the button is a special Label, but the button has the function of clicking response.
from tkinter import *
root = Tk()
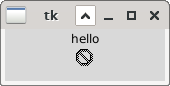
label_1 = Label(root,text="hello")
label_2 = Label(root,bitmap="error")
label_1.pack()
label_2.pack()
root.mainloop()
As follows, two labels are used, one shows text and the other shows a bitmap
About Image Display Note: Python has 10 built-in bitmaps, which can be used directly. Just set the bitmap. * gray75 * gray50 * gray25 * gray12 * hourglass * info
error
question
* warning
The image attribute in Python only supports the gif, pgm, and ppm formats. bitmap supports xbm. Setting method:
photo = PhotoImage(file="image.gif")
bmp = BitmapImage(file="logo.xbm")
label = Label(root,image = photo)
Note: You only need to set one of the image and bitmap parameters. If you set two properties at the same time, image will take precedence
If you need to display pictures in other formats, you need to do some special processing. The Python image processing library-PIL library is used. However, PIL does not support Python3, and the library is too old. It is not recommended to use it, here you can choose its alternative, the Pillow library, and the function is used in the same way as PIL. First, download and install the Pillow Library Online.
from PIL import Image, ImageTk

image = Image.open("F:\\001.jpg")
photo = ImageTk.PhotoImage(image)

# Label
label= Label(root,image = photo)
label.pack()
Related course: Python Desktop Apps with Tkinter
Entry
A single-line text input box. It can be used to accept user input, but only one line can be entered. If you just want to showShow instead of editing, then tags should be used.
w = Entry( master, option=value ... )
Note that Entry is different from Lable and Button, and its text attribute is invalid. Then you need to change the Entry display text if you operate?
from tkinter import *
root = Tk()
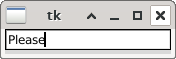
e = StringVar()
# Use the textvariable attribute to bind the string variable e
entry = Entry(root,textvariable = e)
e.set ('Please')
entry.pack()
root.mainloop()
About StringVar
This class belongs to tkinter. When programming the interface, it is necessary to track the change of variable value to ensure that the value change can be displayed on the interface at any time. Since python cannot do this, the corresponding object of tcl, which is StringVar, is used.. StringVar has other functions besides set: get is used to return the value of the StringVar variable, and trace(mode, callback) is used to call the callback function when a certain mode is triggered.
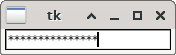
Set as password box: When the user enters the secret in the EntryWhen the code is, you want the password entered to be invisible, not plaintext, you can use the show attribute
from tkinter import *

root = Tk()
entry = Entry(root,show="*")
entry.pack()
root.mainloop()
Entry can also set its state attribute to "readonly" to onlyRead, the single-line text box cannot be edited, and it becomes a Label that displays text.
from tkinter import *

root = Tk()
entry = Entry(root)
entry['state'] = 'readonly'
entry.pack()
root.mainloop()
Radiobutton
Radio button, that is, only one button can be selected in the same group.When one button is used, the other buttons are automatically changed to unselected. Unlike other controls, it has the concept of group
w = Radiobutton ( master, option, ... )
The use of this button is relatively simple, and the command Association function is also used to respond when clicked.
from tkinter import *
def sel():
    selection = "You selected the option " + str(var.get())
    print(selection)

root = Tk()
var = IntVar()
R1 = Radiobutton(root, text="Option 1", variable=var, value=1,command=sel)
R1.pack( anchor = W )
R2 = Radiobutton(root, text="Option 2",variable=var,value=2,command=sel)
R2.pack( anchor = W )
R3 = Radiobutton(root, text="Option 3", variable=var, value=3,command=sel)
R3.pack( anchor = W)
root.mainloop()
Finally, I recommend some very good information about tkinter: Tkinter Examples and Code